
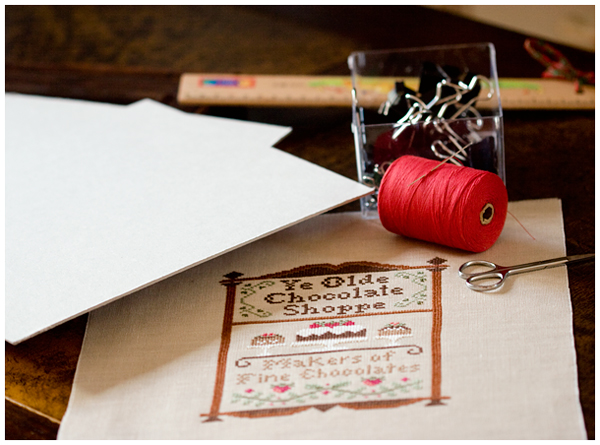
Reikalingos priemonės: rėmai su dviem kartono lakštais (vienas tempimui, kitas nugarėlei), liniuotė, spaudės, storas siūlas su didele adata, žirklės.
Necessary supplies: frame and two cardboards (one for mounting your stitched piece and one for the back), ruler, clips, thick thread and big needle, scissors.
Необходимые средства: рамка с двумя листами картона (один для натяжки вышивки, другой для задника), линейка, зажимы, толстая нитка, большая иголка, ножницы.
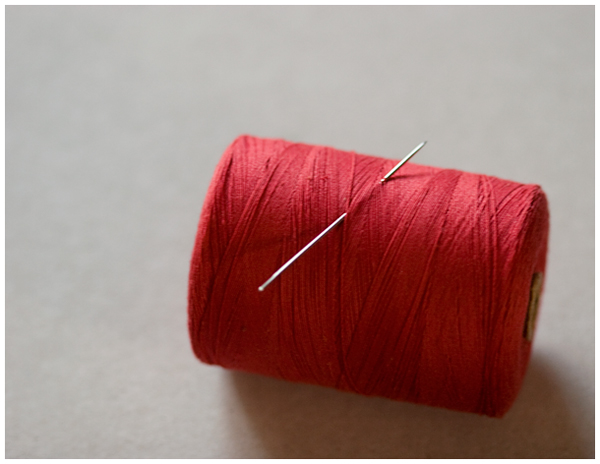
Siūlai tempimui - tvirti medvilniniai.
Thread for mounting - strong cotton thread.
Толстая нить для натяжки.
Siuvinį pasidedame ant kartono lakšto ir matuodami traukome taip, kad iš visų pusių būtų po lygiai centimetrų. Jei paveikslą kabinsime aukščiau nei akių lygyje, apačioje turėtų būti 1-1,5 cm daugiau.
Place your needlework on the cardboard and measure the same distance from алл sides. If the picture is hanging higher than your eyes, the distance from the edge in the bottom should be 1-1,5 cm bigger than on other sides.
Положите вышивку на картон и отмерьте равное расстояние с каждой стороны. Если вышивка будет висеть выше уровня глаз, расстояние внизу должно быть на 1-1,5 цм больше, чем с других сторон.
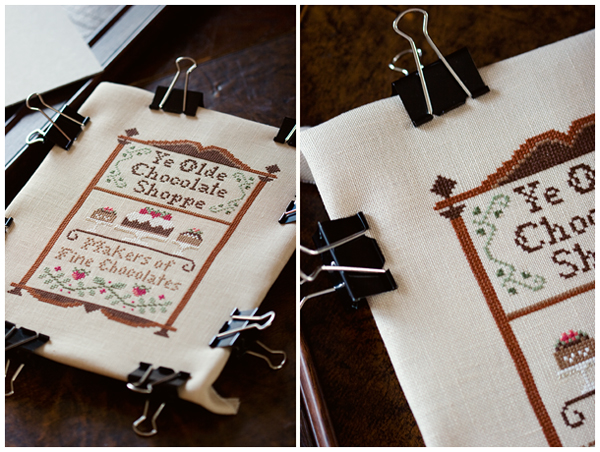
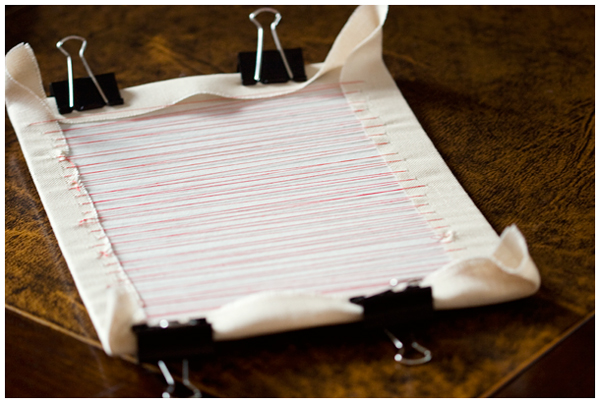
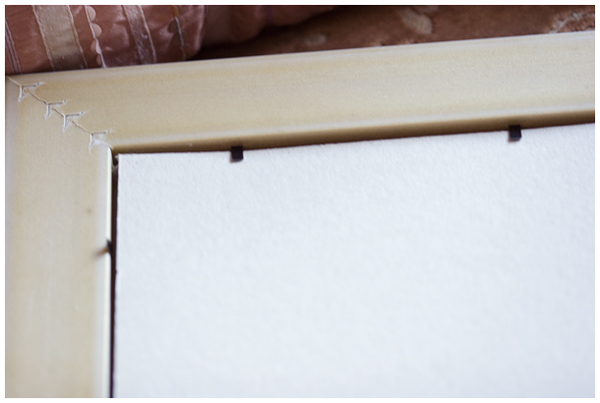
Viską gerai išmatavę siuvinį ant kartono iš visų pusių apspaudžiame spaudėmis.
After you have made all necessary measurements, fasten your needlework to the cardboard with clips.
После того, как сделаны все измерения, прикрепите вышивку к картону со всех сторон при помощи зажимов.
Blogojoje pusėje siuvame horizontaliai gerokai patempdami siūlą.
Sew horizontally on the wrong side. The thread should be tight.
Сшиваем на изнаночной стороне по горизонтали, хорошо натягивая нить.
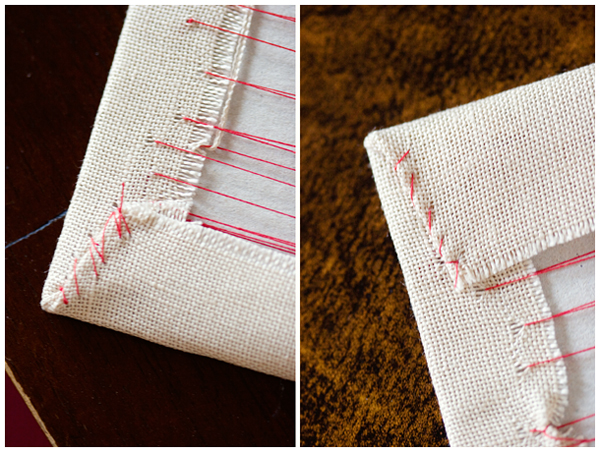
Susiuvame kampus.
Sew the corners.
Закрепите углы.
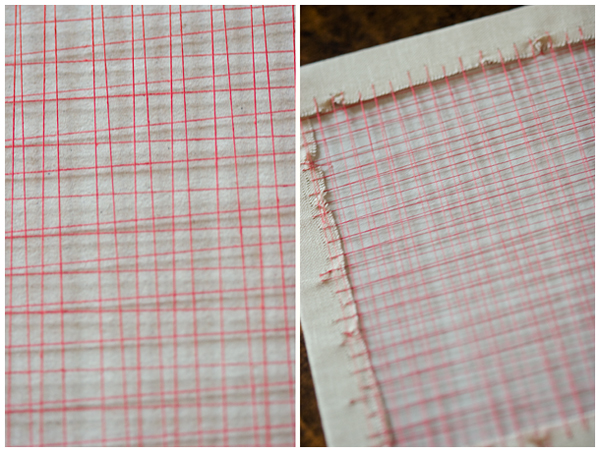
Vėl patempdami siūlą siuvame vertikaliai.
Now do the same vertically.
Теперь закрепите вышивку по вертикали.

Siuvinys tvirtai ištemptas ant kartono.
Your needlework is fastened to the cardboard.
Вышивка крепко натянута на картон.
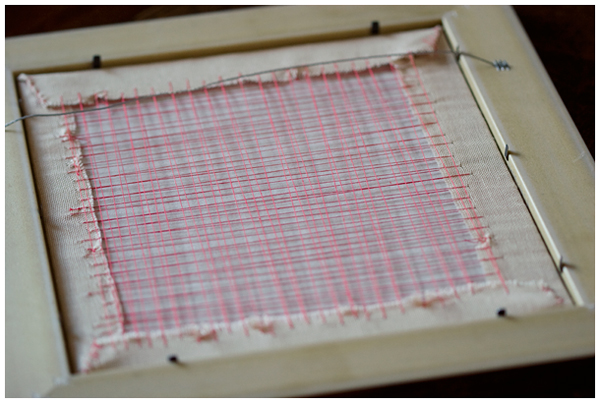
Įstatome ištemptą siuvinį į rėmelius.
Place the cardboard with your needlework into the frame.
Вставьте натянутую вышивку в рамку.
Uždedame nugarėlę (kartono lakštą).
Place the second cardboard (the back)
Вставьте задник (второй лист картона).
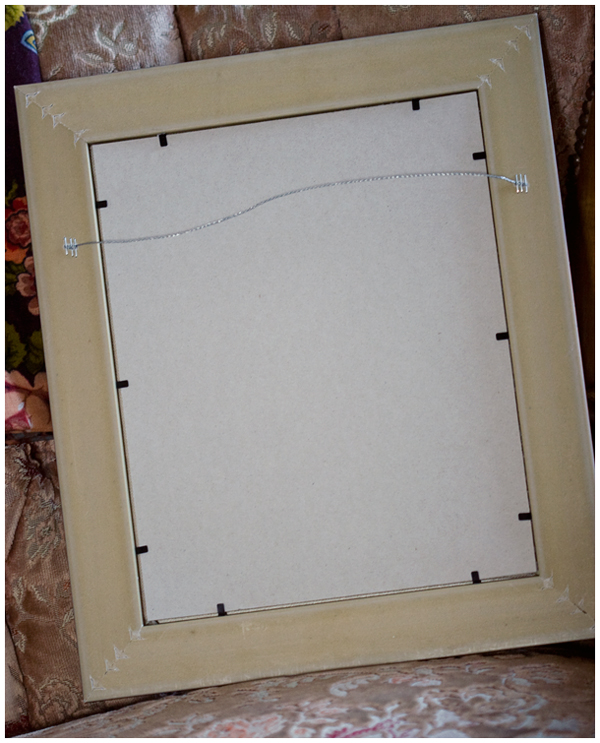
Užtvirtiname nugarėlę.
Fasten.
Закрепите.
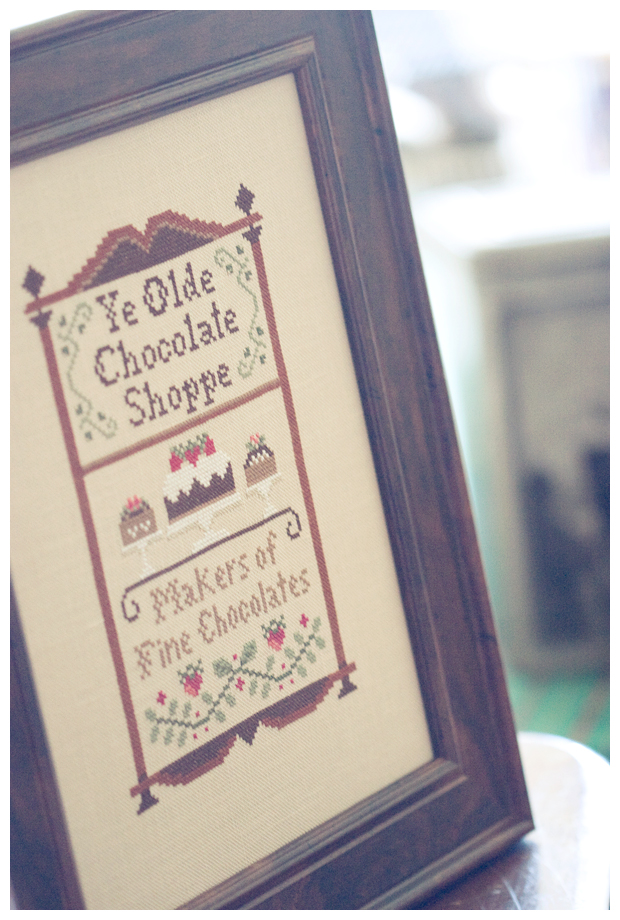
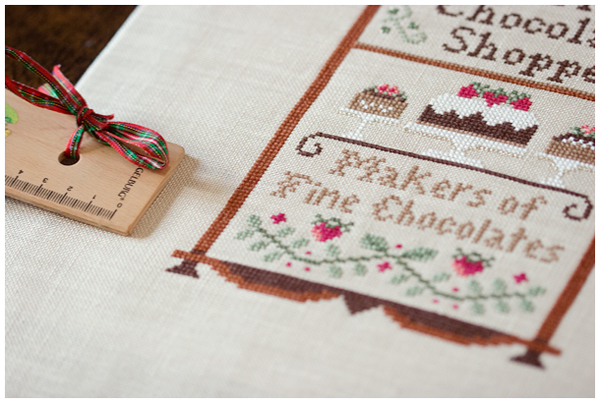
Paveikslas įrėmintas, galime kabinti.
Your picture is reading for hanging.
Картина оформлена, можно повесить.


.JPG)


.jpg)
19 komentarų:
labai aciu Loreta uz aiskia ir isamia reminimo pamoka :) pribrendo laikas megint remint paciai ir man :)
Very beautiful stitching and framing! I enjoy your blog very much.
great tutorial,i like how look the work in the frame.
Super tutorial! Thank you Loreta!! But you make also the frame by yourself???
You make it look so easy! Your blog has to be one of the loveliest around--your photography is amazing. It is always a treat to visit...
Me ha gustado el tutorial que has hecho,está muy bien explicado.
Por cierto,como siempre me encantan tus fotos...tienen ese toque tan "tuyo".
Un beso desde España.
I enjoyed watching your blog, with all those beautiful stitchings.
Great photos and instructions, Loreta! Thank you!
Спасибо, Лорета! Обязательно пригодится!
Лорета, дорогая, спасибо! Я как раз мечтала узнать о натяжке: все багетные мастерские прокалывают вышивку скобами, а мне на это жалко смотреть. Я пыталась стянуть нитками, как ты, но не догадалась закрепить зажимами, потому мне не удавалось сделать это идеально ровно! Как все просто ты придумала, спасибо!
thank you a bunch for sharing your skills: your tutorial looks so useful that I've to give my finished pieces a chance.
pagyrimai, šaunuolė:)
Так наглядно и абсолютно понятно, спасибо огромное за мастер-класс :)!!
ПС: красные нитки прям как были дома у моей мамы в ящичке для шитья, удивительно! ;))))
Wonderful tutorial! You give me an idea of how to frame it which I haven't done it before. I always watch your blog, you made many heart shape patterns which I loved very much, so I ordered the “Summerland” book and want to do my first heart shape pattern, but I have no idea of how to sew the front and back cotton, appreciate if u could make a tutorial of how to do this step by step?…..I’m from Hong Kong, there is not that much of needlework, those pattern in the book are very beautiful, what a pity that I don’t understand the language shown in the book!
Thanks for the great tutorial. I can't wait to give it a try. I enjoy visiting your blog and the pictures are always so lovely!
Dear Loreta,
thank you for showing your framing technique. You work very exactly!
The stitching is a further wonderful work .... I love it!
Love from Austria
Hilda
Thank you for this tutorial! I'm Italian and don't understand your languige. Can you post a translater in your blog? It is fantastic!
Fantastic! Thanks for sharing!
SO BEAUTIFUL!!!! :)
Thank you: vanessza
Rašyti komentarą